First, if you do not have the ability to “Go Offline” then you will only be able to modify your synchronization with contacts (without going offline, activities are the only other items that sync with your install). If you have the Outlook client that allows you to “Go Offline” then you have the full capability to modify each record type according to your security role.
Here’s where to find the setting:
From within Outlook, click on the “CRM” Menu, and then choose “Modify Local Data Group.”

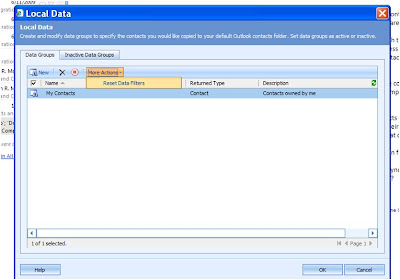
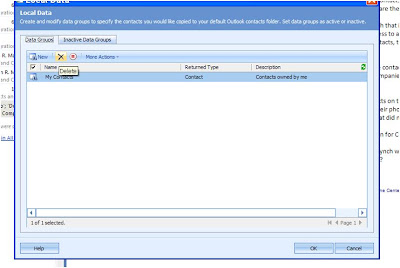
A new window will appear showing all of your active data groups. You can create a new group, delete a group, or deactivate any of the groups shown in your window.

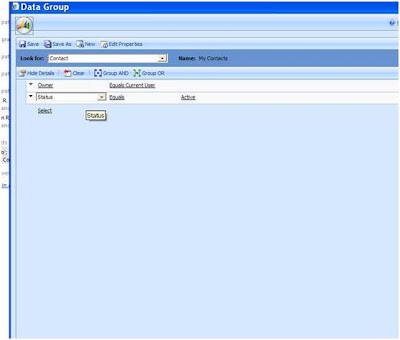
To edit a data group double click on the group. This will bring up an Advanced Find window. Modify the query and whatever is returned in the query is what you will sync to your personal computer once saved. By adding date ranges, records owned by certain users, or other options will expand or limit what is actually synchronized.
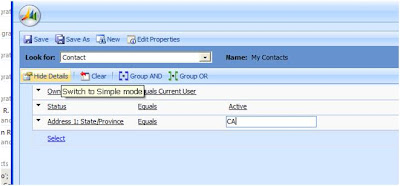
To synchronize all California Contacts that I owned, I would use the query below:
If you need to reset back to the default “My Contacts” Group, use the option under “More Actions”.
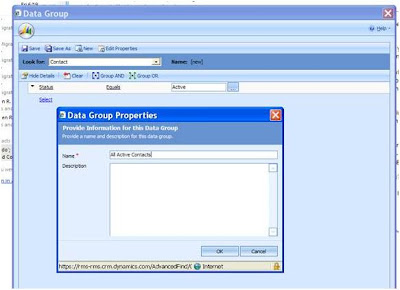
You can rename a group.
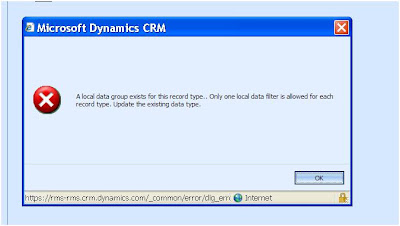
You are only allowed to have one data group for each record type. It doesn’t matter if it is active. If you think you don’t have a data group, it’s probably inactive. (The only record type you can have in your local data groups are contacts, unless you have the offline client.)

Also, bear in mind that you are only allowed one data group per record type.
To delete a group, highlight and click the delete button. I personally don’t recommend doing this; I recommend deactivating and creating your own.
To deactivate a data group, just highlight the group and click on the red square within a circle button. This makes is so that you keep any filter but don’t apply that filter’s logic when synchronizing.
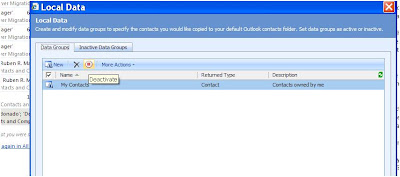
To activate an inactive group, go to the “Inactive Data Groups” tab, highlight the group to activate, and click on the arrow within the circle.


To synchronize all California Contacts that I owned, I would use the query below:

If you need to reset back to the default “My Contacts” Group, use the option under “More Actions”.

You can rename a group.

You are only allowed to have one data group for each record type. It doesn’t matter if it is active. If you think you don’t have a data group, it’s probably inactive. (The only record type you can have in your local data groups are contacts, unless you have the offline client.)

Also, bear in mind that you are only allowed one data group per record type.

To delete a group, highlight and click the delete button. I personally don’t recommend doing this; I recommend deactivating and creating your own.

To deactivate a data group, just highlight the group and click on the red square within a circle button. This makes is so that you keep any filter but don’t apply that filter’s logic when synchronizing.

To activate an inactive group, go to the “Inactive Data Groups” tab, highlight the group to activate, and click on the arrow within the circle.

Remember, you need to have your contacts synching or it doesn’t matter what you do with your local data group.
Also, be sure to check the box to update the outlook company field with the CRM Parent Account Name.

David Fronk
Dynamic Methods Inc.
No comments:
Post a Comment